Introduction
In this tutorial series, you will learn how to use a Raspberry Pi Zero to display the current temperature on a ws2812b 32x8 LED matrix in Python.
In Part 1, we will cover setting up the Raspberry Pi Zero, creating the library, and displaying color on the LED matrix.

Hardware:
- ws2812b 32x8 LED matrix
- Needle hook clamp
- Power supply
- Raspberry Pi Zero + Micro SD card

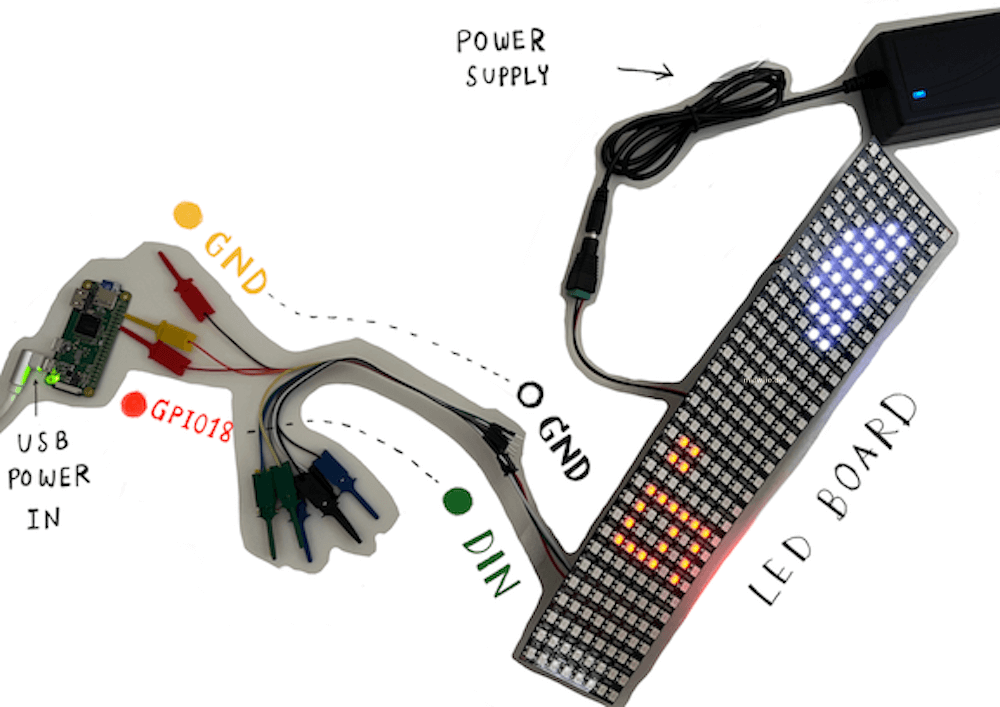
I am using a USB cable to power the Raspberry Pi.
Set up Raspberry Pi Zero:
- Install Raspberry Pi OS system on Micro SD card (Raspberry Pi). Please see here
- Set up Wifi and enable SSH.
- Make sure that you are able to SSH into the Raspberry Pi. Otherwise, you will need to redo the setup steps.
raspberrypissh pi@IP ## ssh into Raspberry Pi

mkdir display ##create directory

cd display

touch red_dot.py ## create file

mkdir lib ## create lib directory

cd lib

touch pixels.py ## create file for lib
- Here are the steps to connect the LED to your Raspberry Pi Zero board and copy the code into the correct file:
- Connect the ground cable to ground pin and the LED to GPIO 18 on the Raspberry Pi board. To see the layout of the Raspberry Pi Zero, you can refer to this link.
- Copy the code provided below into the
pixels.pyfile inside thelibdirectory. Additional resources via the following link
lib/pixels.pyimport math
from rpi_ws281x import PixelStrip as Adafruit_NeoPixel, Color


# LED strip configuration:
LED_PIN        = 18        # GPIO pin connected to the pixels (must support PWM!).
LED_DMA        = 5         # DMA channel to use for generating signal (try 5)
MATRIX_HEIGHT  = 8
MATRIX_WIDTH   = 32
LED_COUNT      = MATRIX_HEIGHT * MATRIX_WIDTH # Number of LED pixels.

class Pixels:
    """A beautiful matrix of pixels."""

    _neopixels: Adafruit_NeoPixel
    """The stripe of LEDs correspoding to the matrix. Internal use only."""

    def __init__(self, brightness = 30):
        """Set brightness to 0 for darkest and 255 for brightest."""

        self._neopixels = Adafruit_NeoPixel(
              num = LED_COUNT,
              pin = LED_PIN,
              dma = LED_DMA,
              brightness = brightness
        )
        self._neopixels.begin()

    def __enter__(self):
        self.clear()
        self.show()
        return self

    def __exit__(self, exc_type, exc_value, exc_traceback):
        self.clear()
        self.show()

    def show(self):
        """Flushes all uncommited pixel changes to the pixels."""

        self._neopixels.show()

    def fill(self, color: Color):
        """Completely fills the matrix with the given color."""

        for i in range(LED_COUNT):
          self._neopixels.setPixelColor(i, color)

    def clear(self):
        """Sets the matrix into a clean state."""

        self.fill(color = Color(0, 0, 0))

    def set(self, x: int , y: int, color: Color):
        """Set the pixel at the given coordinates with the given color."""

        if x < 0 or x >= MATRIX_WIDTH:
            return

        if y < 0 or y >= MATRIX_HEIGHT:
            return

        led_number: int = x * MATRIX_HEIGHT + y
        if (math.floor(led_number / MATRIX_HEIGHT) % 2) == 1:
          self._neopixels.setPixelColor((x + 1) * MATRIX_HEIGHT - y - 1, color)
        else:
          self._neopixels.setPixelColor(led_number, color)
- Next, open the file
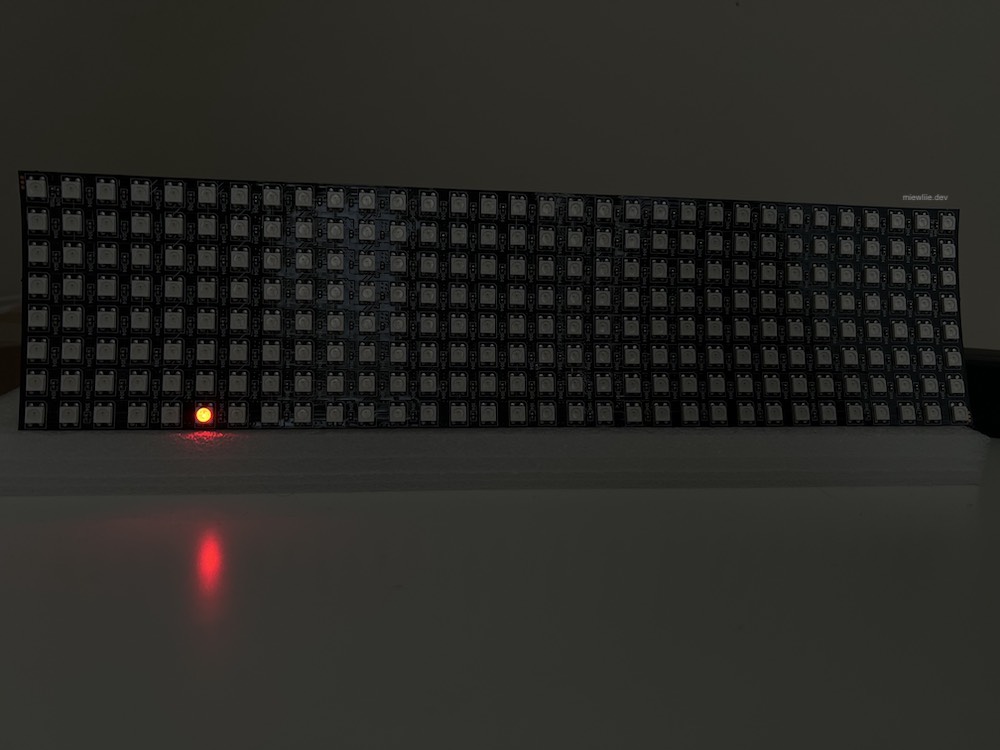
~/display/red_dot.py. In this file, we will fill the LED matrix at the x=5, y=7 position with red color to verify that the connection is working properly.
display/red_dot.pyfrom lib.pixels import Color, Pixels

DELAY = 0.25
color = (255, 0, 0)


if __name__ == '__main__':
    x, y = [5, 7]
    pixels: Pixels = Pixels()
    pixels.set(x, y, Color(*color))
    pixels.show()
- To execute the
red_dot.py,typesudo python red_dot.pyinto the terminal. If the connection is working properly, you should see a red color display on the LED board at the specified position. Congratulations 👏🏽! You have completed part 1 of the tutorial.

** Part 2 💻